|
0 members (),
16
guests, and
1
robot. |
|
Key:
Admin,
Global Mod,
Mod
|
|
|
S |
M |
T |
W |
T |
F |
S |
|
|
|
1
|
2
|
3
|
4
|
5
|
|
6
|
7
|
8
|
9
|
10
|
11
|
12
|
|
13
|
14
|
15
|
16
|
17
|
18
|
19
|
|
20
|
21
|
22
|
23
|
24
|
25
|
26
|
|
27
|
28
|
29
|
30
|
|
|
|
|
|
Forums13
Topics7,385
Posts40,945
Members10,040
| |
Most Online3,137
Apr 9th, 2026
|
|
|
|
Joined: Aug 2012
Posts: 3
stranger
|
|
stranger
Joined: Aug 2012
Posts: 3 |
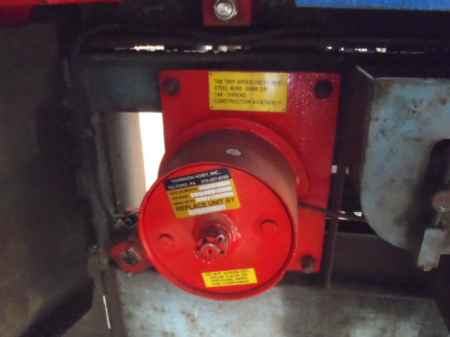
Does anyone know where I can find adjustment procedures for the above selector. I had a major crash with pie plates all stacked up and wanted to start from ground 0 and go A to Z if possible.
Thanks for any help.
|
|
|
|
|
Joined: May 2012
Posts: 194
member
|
|
member
Joined: May 2012
Posts: 194 |
Why did it crash...loose pie plate or not proper lift clearance on the crown...start from scratch leveling crown lift adjustments can be setup while running up/down on inspection..car must be spotted level at a giving floor some start at the center and work there way in either direction but proper lift clearances have to be setup first by adjustment on crown first...there are several ratios on the 6850bj selector w/advancer..some are closer than others depending on the contract speed setup.some can be setup for 3/16 lift..all is effected how worn other parts are..good luck not a nice job..
|
|
|
|
|
Joined: May 2011
Posts: 487
addict
|
|
addict
Joined: May 2011
Posts: 487 |
Just recently went down that road again... hadn't done one in many years, not fun. Use a long run button and do like Len said and set it up on inspection. I removed all the wrecked plates and switches and replaced the switches and positioned the plates where they looked to have been. Then ran on inspection up and down to check clearances then got someone in the car and marked exact floor levels on the selector tape so i could see myself exactly where the car was as i was adjusting it.. Just keep your fingers crossed during adjustment and after you let it go. I'm sure this is not the Big O's standard but it's all i know without having been properly trained.
Last edited by E-man; 08/13/12 11:12 PM.
|
|
|
|
|
Joined: Aug 2011
Posts: 563
addict
|
|
addict
Joined: Aug 2011
Posts: 563 |
normally(well here anyway) the vernier adjustments were marked on the side of the selector. you ALWAYS start at the master floor(normally in the middle somewhere), disconnect the pin on the tape wheel to spin freely(remembering where you started to put it back there ie master floor)then add the adjustment written down then adjust the pie plates as you go up. then repeat going down from the master floor. this will give you atleast an aproximate pie plate adjustment. you then to test it via inspection speed but you have to make sure of the pall magnet lift for clearance. not an easy job and im no expert.having the vernier adjustments really help hence why they are written down.
|
|
|
|
|
Joined: May 2011
Posts: 487
addict
|
|
addict
Joined: May 2011
Posts: 487 |
I've only done it 2 or three times, I do remember the first couple had red paint indicating the master floor. Look for red paint somewhere in the middle. This last one did not. I didn't wanna mess with taking the loose the selector tape sheave unless I had to, I've only done that when the selector tape breaks. I would liked to have watched an old Otis Adjuster back in the day set a high rise selector up.
|
|
|
|
|
Joined: Apr 2010
Posts: 179
elevator lifer
|
|
elevator lifer
Joined: Apr 2010
Posts: 179 |
they sell a great electronic upgrade for that , May be cheaper and way more effecient
|
|
|
|
|
Joined: May 2012
Posts: 194
member
|
|
member
Joined: May 2012
Posts: 194 |
I had a job that had 22 cars and 9 where 22 stops.this was a common practice and you had no choice but get better at it.some guys would loosen the 2 bolts on the spider,but that only worked if your tape was properly marked and tape had not stretched, I would always do it from scratch.replace the broken switches,spot the car floor level starting at the bottom aligned the pie-plate with the center mark to fixed tab marker for proper height..run to the next floor setup.again run down while checking your lifting clearances on the crown making sure you don,t tear up any of the switches proper clearance can be accomplished by adjustment screw on the pawl..if all is good continue to next floor and complete the work...as long as the hx swiches are breaking, and dz are making while on the plates the only thing you may have to adjust are your dead zones of lu and ld switches.
|
|
|
|
|
Joined: Apr 2011
Posts: 565
jack of all depts
|
|
jack of all depts
Joined: Apr 2011
Posts: 565 |
Add to the above-
The floor bars themselves are presummed to have not moved?
They initially get set up from scratch, by centering them on the synchronous panel while at floor level, as best as I can remember.
If you have an advancer panel, then you will have "SLS" cams, that unwind once the advancer has dogged out onto a pawl, and the car is leveling into the floor. (GK wing hits contact, strengthening the motor field, for more torque for the stop) This unwinding of the SLS cams drops out the speed switches. (They don't control the pick of the speed switches, that is done by a timer board) ARCO Towers in Los Angeles had 8 speed switches. A long ass S-curve, for fast cars, and no close-loop feedback. Ah, the sh*t we used to do before processors!
Note that each SLS cam # does not necessarily correspond to the same speed switch #, you gotta check the print. Saw a job at UCB, aka US Bank, downtown Los Angeles, 62 story job, (aka the Towering Inferno in 1987), where the adjustor kept tapping the same SLS cam around, expecting the corresponding numbered speed switch to drop out. The definition of insanity is doing the same thing over and over again, expecting a different result. As his dumb helper, I looked at the print, and showed him his error. That was a bad day for me, and the last time I was his helper again. Big pussy was so conceited....
At the master floor, check that each SLS cam drops out the speed switches (weakening the gen field) in regular, evenly spaced increments. You undo the tape sheave hub while at master floor level, crank the center pole of the selector away from floor level, (depending on how fast the job is, it might need several floors of cranking for 2, 3, or even 4 floors of slowdown) then put a meter accross SLS 1, then rotate the center pole towards floor level, and note the degrees on the vernier when the meter indicates the first SLS cam has changed states. Repeat for the other SLS cams, and for the pie plate contacts. Then do the same for the other direction, coming into the master floor. You should end up with a list in the up direction, and one for the down direction, indicating at what degree of rotation away from floor level each switch actuated at. (i.e., 280, 210, 180, 150, 110, 83, 50, etc, something like that)
So in short, you are checking the degrees of selector rotation on the vernier, from where the switch(es) change states, to where you are level with the master floor. The point is to ensure that all selector slowdowns and pie plate switches are evenly spaced, (no wild anomalies, no dead spots, etc), providing a smoothly constructed S-curve profile to the generator field. If your slowdown is too gradually tapered, it may bomb through the floor. If it is too abrupt, it makes an uncomfortable ride, and heats things up. Same sh*t you do with a hydro valve, or parameters in software for a modern processor-based, program-driven traction with VVVF drive.
The speed switches drop out, and the opening of their n/o contacts inserts more resistance in series with the main generator field. weakening the field and slowing the car. Never adjust a resistor to compensate for a cam out of adjustment. You can create hot-spots, and in effect require too much heat dissapation accross too small an area of a resistor, making it melt. (If not now, then later!) I think it's better the use as much of the tube as possible, so it can dissapate it's rated watts, and adjust the cams as neccessary. But it also depends on your desired floor-to-floor times.
Man, I can't beleive we are still talking about this old stuff!
As years go by, "cowboy" techs desperate for a quick fix have changed things, bent pie plates, moved things around without proper justification, and the S-curve is likely f'd up.
Also, you might have a "music box" on the car top, it's roller actuated by long ass cams in the hoistway, one at each terminal. These are the "auxilary means of slowdown, in case the normal means fail". These contacts are in parallel with the selector contacts. Back in the old days, the adjustor would have the helper run the car into the terminals, while he turned the adjusting screws for each contact. If the contact had a slight spark, that meant the music box was breaking the circuit before the selector, and he'd back off the adjustment until the spark "just" dissapeared. This meant that it was the selector contacts were doing the primary slowdown functions, and the music box was a close secondary means of slowdown, "just" behind the normal means. You could also rough-set them by measuring given distances from top or bottom floor level, and adjusting them to actuate at those pre-set elevations.
Also, with only the genny leveling field active, you want to compare the "base speed" in both the up and down, with a balanced load, (passing the master floor", to check the compounding. Add or remove turns to equalize the base speed up + dwn. (This is assuming the car + cwt have been balanced first)
Also, make sure your LU and LD pie plate contacts are close enough to the plate, so that the dead zone is no more than 1/4" each way, for 1/2" total. Put them too close together, the car can oscillate at the floor level. (Thought I was gonna say "jack off" at floor level, didn't you!)
If you have two door zone contacts, moving them towards the center of the plate will advance pre-opening, and moving them away from the center of the plate will retard pre-opening. In the USA, the car sill must be level with the landing sill, by the time the doors are 3/4 the way open.
All the above is only off the top of my head. It could be a little inaccurate. I haven't worked on that stuff for over 20 years.
Last edited by Vic; 08/14/12 06:09 PM.
|
|
|
|
|
Joined: Apr 2011
Posts: 565
jack of all depts
|
|
jack of all depts
Joined: Apr 2011
Posts: 565 |
As time goes by, the selector chain stretches, which makes the synchronous panel and thusly the LV ring "droop", relative to car position, and now the LV ring contacts ride closer to the pie plate, which changes the way it levels at the floor. If it droops too far, it will crash the plates, and wipe out the selector. Check your chain tension, adjust if necessary.
Especially after you oil a chain!!!!!
The oil flushes dirt out of each link, over a couple of days, and the selector can crash after you have performed regular maintenance! Gotta watch 'em after you oil 'em. Just like escalator step chains. They can pop the chain tension switches, a few days after oiling.
Last edited by Vic; 08/14/12 06:15 PM.
|
|
|
|
|
Joined: Aug 2012
Posts: 132
member
|
|
member
Joined: Aug 2012
Posts: 132 |
With any luck,someone marked them were they should approximately go.(I always do that on mine).
Find the master floor,position the car floor level.your crosshead on the selector should line up.
Set up your first pie plate there.Then unbolt the tape sheave so you can move it freely for all your settings and adjustments.
I have to dig around for my adjusting book I got for the degrees and clearances.
My dad adjusted many of them back in the day and showed me how to,but that was long ago.
One thing he did do was write down all the settings on the prints,but you are probably not that lucky.
If you have another car you can use,check those settings.
Then just do that at every floor.A long tedious process.
|
|
|
|
|
Joined: May 2012
Posts: 194
member
|
|
member
Joined: May 2012
Posts: 194 |
Brings back a lot of memories long hours setting those up and the pride and the satisfaction you get when all your stops are good and floor levels are right on, it is almost really worth it until the tape breaks and you get to do it all over...oh how I miss those days..
|
|
|
|
|
Joined: Aug 2011
Posts: 563
addict
|
|
addict
Joined: Aug 2011
Posts: 563 |
Brings back a lot of memories long hours setting those up and the pride and the satisfaction you get when all your stops are good and floor levels are right on, it is almost really worth it until the tape breaks and you get to do it all over...oh how I miss those days.. when tuners were actually um tuners!!!!!!
|
|
|
|
|
Joined: Aug 2011
Posts: 563
addict
|
|
addict
Joined: Aug 2011
Posts: 563 |
Add to the above-
The floor bars themselves are presummed to have not moved?
They initially get set up from scratch, by centering them on the synchronous panel while at floor level, as best as I can remember.
If you have an advancer panel, then you will have "SLS" cams, that unwind once the advancer has dogged out onto a pawl, and the car is leveling into the floor. (GK wing hits contact, strengthening the motor field, for more torque for the stop) This unwinding of the SLS cams drops out the speed switches. (They don't control the pick of the speed switches, that is done by a timer board) ARCO Towers in Los Angeles had 8 speed switches. A long ass S-curve, for fast cars, and no close-loop feedback. Ah, the sh*t we used to do before processors!
Note that each SLS cam # does not necessarily correspond to the same speed switch #, you gotta check the print. Saw a job at UCB, aka US Bank, downtown Los Angeles, 62 story job, (aka the Towering Inferno in 1987), where the adjustor kept tapping the same SLS cam around, expecting the corresponding numbered speed switch to drop out. The definition of insanity is doing the same thing over and over again, expecting a different result. As his dumb helper, I looked at the print, and showed him his error. That was a bad day for me, and the last time I was his helper again. Big pussy was so conceited....
At the master floor, check that each SLS cam drops out the speed switches (weakening the gen field) in regular, evenly spaced increments. You undo the tape sheave hub while at master floor level, crank the center pole of the selector away from floor level, (depending on how fast the job is, it might need several floors of cranking for 2, 3, or even 4 floors of slowdown) then put a meter accross SLS 1, then rotate the center pole towards floor level, and note the degrees on the vernier when the meter indicates the first SLS cam has changed states. Repeat for the other SLS cams, and for the pie plate contacts. Then do the same for the other direction, coming into the master floor. You should end up with a list in the up direction, and one for the down direction, indicating at what degree of rotation away from floor level each switch actuated at. (i.e., 280, 210, 180, 150, 110, 83, 50, etc, something like that)
So in short, you are checking the degrees of selector rotation on the vernier, from where the switch(es) change states, to where you are level with the master floor. The point is to ensure that all selector slowdowns and pie plate switches are evenly spaced, (no wild anomalies, no dead spots, etc), providing a smoothly constructed S-curve profile to the generator field. If your slowdown is too gradually tapered, it may bomb through the floor. If it is too abrupt, it makes an uncomfortable ride, and heats things up. Same sh*t you do with a hydro valve, or parameters in software for a modern processor-based, program-driven traction with VVVF drive.
The speed switches drop out, and the opening of their n/o contacts inserts more resistance in series with the main generator field. weakening the field and slowing the car. Never adjust a resistor to compensate for a cam out of adjustment. You can create hot-spots, and in effect require too much heat dissapation accross too small an area of a resistor, making it melt. (If not now, then later!) I think it's better the use as much of the tube as possible, so it can dissapate it's rated watts, and adjust the cams as neccessary. But it also depends on your desired floor-to-floor times.
Man, I can't beleive we are still talking about this old stuff!
As years go by, "cowboy" techs desperate for a quick fix have changed things, bent pie plates, moved things around without proper justification, and the S-curve is likely f'd up.
Also, you might have a "music box" on the car top, it's roller actuated by long ass cams in the hoistway, one at each terminal. These are the "auxilary means of slowdown, in case the normal means fail". These contacts are in parallel with the selector contacts. Back in the old days, the adjustor would have the helper run the car into the terminals, while he turned the adjusting screws for each contact. If the contact had a slight spark, that meant the music box was breaking the circuit before the selector, and he'd back off the adjustment until the spark "just" dissapeared. This meant that it was the selector contacts were doing the primary slowdown functions, and the music box was a close secondary means of slowdown, "just" behind the normal means. You could also rough-set them by measuring given distances from top or bottom floor level, and adjusting them to actuate at those pre-set elevations.
Also, with only the genny leveling field active, you want to compare the "base speed" in both the up and down, with a balanced load, (passing the master floor", to check the compounding. Add or remove turns to equalize the base speed up + dwn. (This is assuming the car + cwt have been balanced first)
Also, make sure your LU and LD pie plate contacts are close enough to the plate, so that the dead zone is no more than 1/4" each way, for 1/2" total. Put them too close together, the car can oscillate at the floor level. (Thought I was gonna say "jack off" at floor level, didn't you!)
If you have two door zone contacts, moving them towards the center of the plate will advance pre-opening, and moving them away from the center of the plate will retard pre-opening. In the USA, the car sill must be level with the landing sill, by the time the doors are 3/4 the way open.
All the above is only off the top of my head. It could be a little inaccurate. I haven't worked on that stuff for over 20 years. hey vic those 'cowboy' types tend to be the nightcall blokes just trying the quick fix to get home again.this level of skill is nearly lost here. even the otis tuners/leading hands are really losing the skill to reset/setup selectors. heres to microprocessor control!!!!
|
|
|
|
|
Joined: Aug 2012
Posts: 132
member
|
|
member
Joined: Aug 2012
Posts: 132 |
That is why I mark them with my sharpy! Always got to love those quick fixes,eh? You know who many times I've had to readjust them just because someone didn't take the time to simply meg the motor. It's amazing leveling problems can be fixed by just blowing out the carbon dust. There was this one time when I got called to a job because of this and they sent over an"expert". I let fiddle with it all day,he couldn't get anywhere. He left and would be there again the next day. Well,I grabbed my little portable air compressor,got there a little early and blew out the motor. He shows up and everything is fine. I just told him I didn't know what happen. 
|
|
|
|
|
Joined: Apr 2011
Posts: 565
jack of all depts
|
|
jack of all depts
Joined: Apr 2011
Posts: 565 |
uppo-
The last time I worked on that stuff, I was actually tearing it out, to do a modernization. Times change...
wow li jet gold-
I like that saying you got there!
La Rocheforcauld, French writer
(I googled it!)
You a Jet Li fan? He is in "The Expendables".
Also, my bad, the music box contacts are in series with the selector switch contacts. If they were in parallel, they wouldn't work!
Last edited by Vic; 08/15/12 04:50 PM.
|
|
|
|
|
Joined: Apr 2011
Posts: 565
jack of all depts
|
|
jack of all depts
Joined: Apr 2011
Posts: 565 |
That is why I mark them with my sharpy! Always got to love those quick fixes,eh? You know who many times I've had to readjust them just because someone didn't take the time to simply meg the motor. It's amazing leveling problems can be fixed by just blowing out the carbon dust. There was this one time when I got called to a job because of this and they sent over an"expert". I let fiddle with it all day,he couldn't get anywhere. He left and would be there again the next day. Well,I grabbed my little portable air compressor,got there a little early and blew out the motor. He shows up and everything is fine. I just told him I didn't know what happen. When I was at Otis, we used to blow out the motor and generators once a year, regulary. Then I went to another company, where nobody did that, not ever. So being the new guy, I tried to do what I thought was right, and blew out a group of six cars. Generators started sparking and failing left and right. That was a particularly bad day... So if it hasn't been blown out in quite a while, might be better to leave it alone! Maybe just clean the brush rigging to keep the loop from going to ground, as a first step. Then if it just HAS to be blown out, ok, but be careful not to fill the air with carbon dust, or it could f'up another elevator.
Last edited by Vic; 08/15/12 09:23 PM.
|
|
|
|
|
Joined: May 2012
Posts: 194
member
|
|
member
Joined: May 2012
Posts: 194 |
Yea,we blew out a Westinghouse generator and the damn thing caught on fire..sometimes better to leave enough alone..
|
|
|
|
|
Joined: Jan 2010
Posts: 671
addict
|
|
addict
Joined: Jan 2010
Posts: 671 |
Dont give up on blowing out motors and gen sets. If you dont the motor shop will end up with them anyway. We use a large fan and bed sheets to controll the carbon dust. Some of our guys even wet the sheets first to catch more dust. Sometimes things have to get worse before they can get better.
|
|
|
|
|
Joined: Aug 2012
Posts: 132
member
|
|
member
Joined: Aug 2012
Posts: 132 |
A plastic bag or sheeting ,duct tape and a vacuum to suck up the dust inside the contained blowout area works great.
|
|
|
|
|
Joined: Apr 2011
Posts: 565
jack of all depts
|
|
jack of all depts
Joined: Apr 2011
Posts: 565 |
A plastic bag or sheeting ,duct tape and a vacuum to suck up the dust inside the contained blowout area works great. Great idea! Dan, do they wrap the sheet around one end of the gen set, like a big sock?
|
|
|
|
|
|
|
|
|
HW PM
by Chris, January 13
|
|
|
|
|
|
|
|
|
|